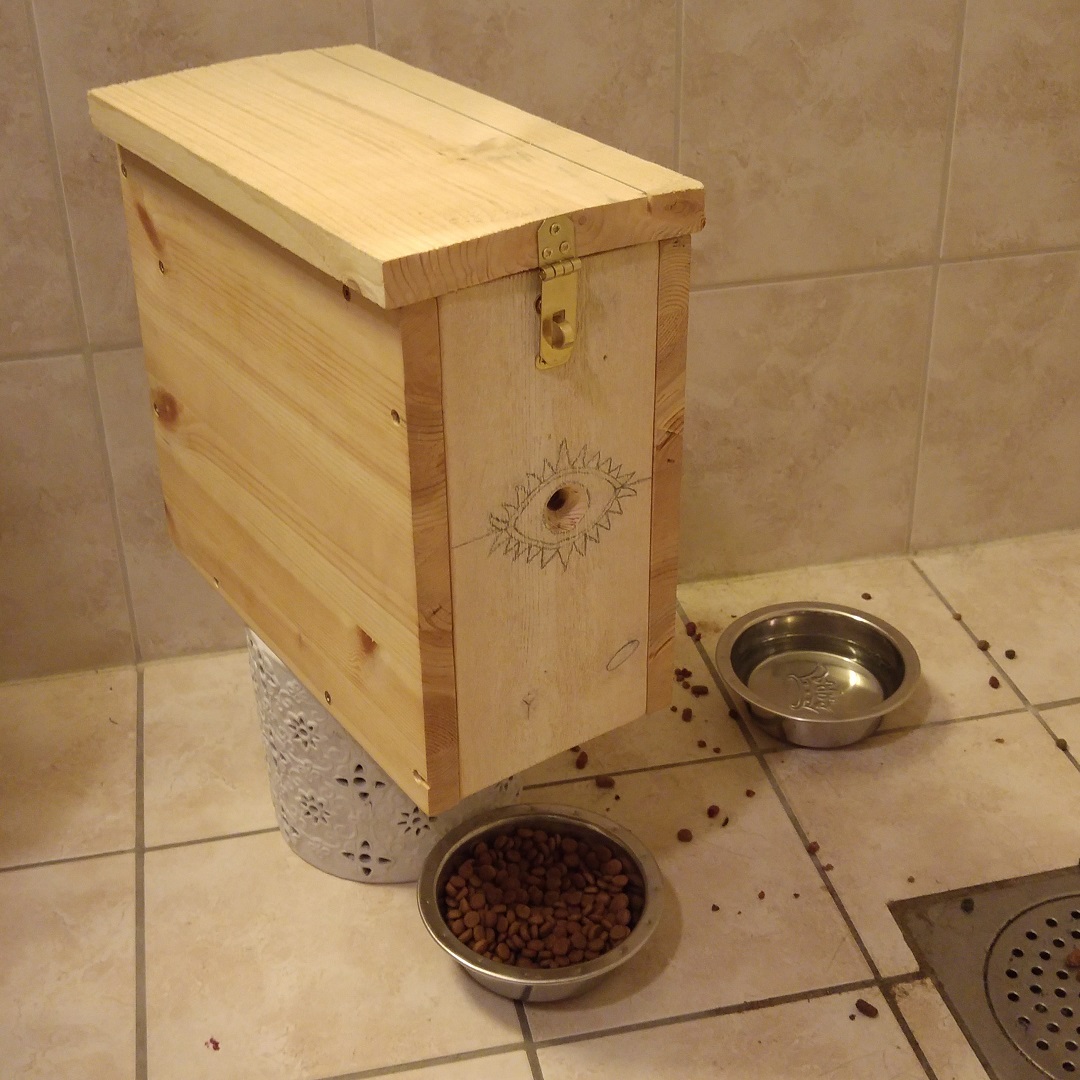
We have a cat, and more than a few times per year find ourselves leaving home for a few days without it. Now usually we ask neighbors or friends to feed it,
but that's hardly over-engineering the problem. With the ubiquity of modern computers, why not automate the process, and get more information
than you could ever want while at it? This project started with some experimenting on the first generation of Raspberry Pi, mainly to learn what new fun
things could be done with a Linux distribution stuffed in such a small form factor. The answer is a whole lot! Much of the experience I gained from this
project is being used further in my next ROV project.
The features I wanted from the automatic cat feeder were automatic feeding (of course), temperature measurement, web camera, power outage detection, and logging
of various events. I also wanted all of this information to be available no matter where I was on the planet, which meant Internet access. To achieve all of this,
I implemented a web-server on the Raspberry Pi, from which regular users can monitor all permitted data. Super users can log in via a password and user,
and access a maintenance menu. The feeding sequence was setup using the UNIX app Cron. What Cron does is check
a special crontab file, and execute jobs listed there. This is done according to a time schedule defined in the crontab file itself. Jobs can be executed either cyclically,
or on special dates. Control of hardware functions is done via a specially made board I designed, which has an on-board temperature sensor, an external sensor, Real Time Clock,
5V power converter, and several hobby servo control outputs. Mechanical parts were designed in OpenSCAD, and printed using my 3D printer.
Software
A major part of this project was the software to control it all. The basic architecture is a number of independent scripts which can all be monitored or modified by a web-server.
The PHP web-server is the user interface, displaying available data and also starting/stopping certain scripts. The main functions of the feeder (feeding and motion capture) are
handled by operating system scheduled tasks in the case of feeding, which is controlled by crontab, and an independent script which places motion capture images in a folder
available to the web-server. The software was written a long time ago, and with several iterations, so my explanation of how it works may be lacking. I have tried to include all
of the relevant source files, however various permissions and other settings aren't as easy to include in a zip file. Some hacking will probably be required to get everything working
from scratch. All source code can be found here.
Web-server
For the web-server I installed lighttpd, with php. I followed the tutorial provided here, which was quite useful:
Running a lightweight webserver on the Raspberry Pi (lighttpd)
In addition, I also had to allow the www-data user permission to use the camera, and I2C bus:
sudo adduser www-data video
sudo adduser www-data i2c
and full rights to the folder where motion captures are dropped. The pi user is running the motion capture script, because of the way I had setup a virtual environment for OpenCV. Scripts, and user rights are explained below.
A username and password prompt has been placed on the website to allow an admin to change the feeding frequency, delete motion captures, update the RTC time
and various other maintenance functions. The web-page appears like this to a user who is logged in.
Crontab editing
To allow the web-server to set and change when to feed a portion, I wrote some php code to automatically update the crontab with new information. There is plenty of information on how crontab works
elsewhere on the Internet, so I'll redirect you here if you're unfamiliar with crontab:
CronHowto.
Quite simply, the php code gets the desired number of portions per day, calculates a feeding interval, and writes it to crontab after first clearing all old crontab entries.
The www-data user shouldn't have any other cronjobs listed, so clearing the entire list before adding a new entry is safe in this case. Keep this mind if you plan on adding
other entries to the crontab!
// Clear all crontab jobs
shell_exec('crontab -r');
// Enter command
shell_exec('(echo "0 */' . $feedingInterval . ' * * * /var/www/feed_portion.sh") | crontab -');
Motion Detection
Motion detection is done using OpenCV, in a python script. I basically followed the tutorial here;
"Home surveillance and motion detection with the Raspberry Pi, Python, OpenCV, and Dropbox" and modified the code to better fit the intended application. As mentioned in the tutorial, as virtual
environment is created and used for OpenCV. Perhaps not necessary, but I did it for the sake of correctness. To ease starting and stopping the motion capture I created a script which loaded the required
environment, booted the python script with the right argument, and deactivated the environment once complete. To make this script run at boot, I created an init script for it which can be seen below.
I followed the instructions on this page for how to create the script, register the correct permissions, and enable activation at boot time.
Raspberry Pi - run program at start-up
#!/bin/bash
# /etc/init.d/motionCapture

### BEGIN INIT INFO
# Provides:          motionCapture
# Required-Start:    $all
# Required-Stop:     $remote_fs $time
# Default-Start:     2 3 4 5
# Default-Stop:      0 1 6
# Short-Description: Motion Capture
# Description:       This service detects motion and saves images.
### END INIT INFO


case "$1" in
    start)
        echo "Starting motionCapture"
        /bin/su pi /var/www/pi_surveillance_script
        ;;
    stop)
        echo "Stopping motionCapture"
        killall python
        ;;
	still)
        echo "Grabbing still image"
		killall python
		/bin/su pi /var/www/pi_still_script
		/bin/su pi /var/www/pi_surveillance_script
        ;;
    *)
        echo "Usage: /etc/init.d/motionCapture start|stop|still"
        exit 1
        ;;
esac
exit 0
What the init script does is provide a standard way for the operating system to work with subsystems at boot time. It also provides a convenient way to run a service.
In the script above I start the surveillance script as the pi user with the "start" argument. Stopping the script is done by killing all python threads. This is only
acceptable in this system because the motion capture is the only python process which runs the entire time. However, if the "stop" command were issued when one of other
python scripts were running, then it would stop the other script as well! In practice this will happen very rarely. The grab still image command "still" stops the motion capture,
takes a still image, and then starts the normal motion capture again. To get this to work when called by the web-server, I had to edit the "sudoers" file and add the following entries:
This allowed the web-server to run the following scripts without needing to provide a password. The shutdown command does not relate to the motion capture, but is something I
used to safely shut down the system from the web interface.
Various Scripts
The other scripts found in the source folder should be pretty self-explanatory. Let me know if any are confusing, and I'll write about them here.
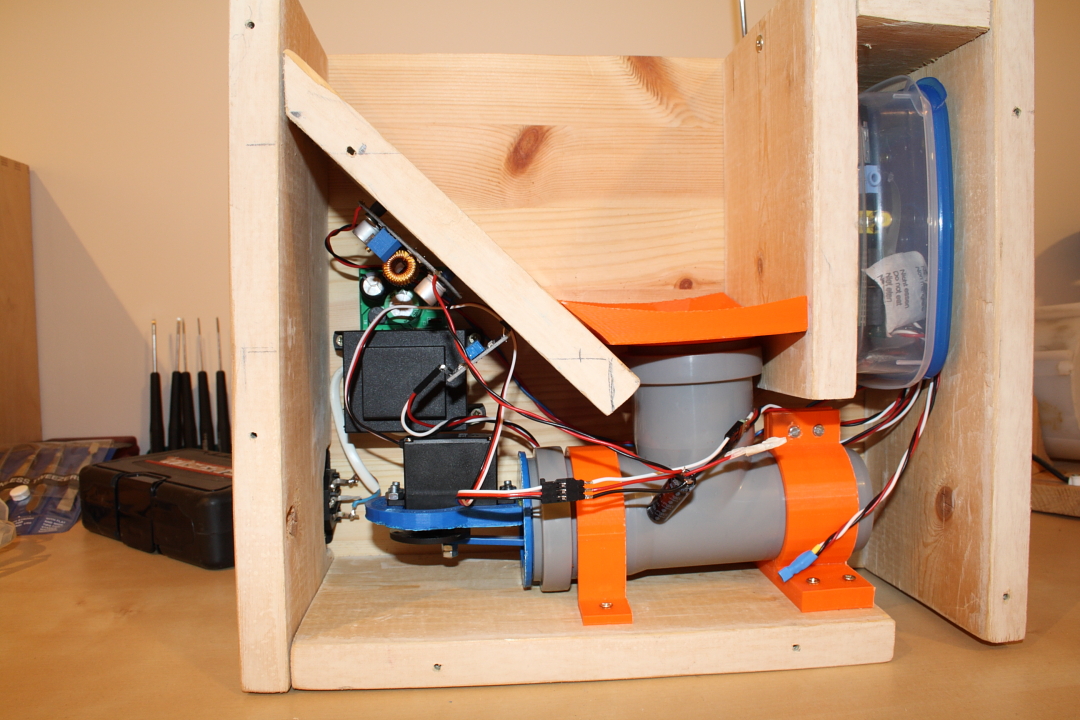
Hardware
The hardware in this project is pretty basic, and can be simplified even further. If sensory input is of no concern, then it can be reduced to just a servo signal board,
and a power supply. However, in the spirit of keeping things over-complicated I elected to include all of the senors mentioned above. And of course, the feeding mechanism
itself would require a custom design.
Specialized Mechanical Parts
Surprisingly, the feeding mechanism turned out to be a major design issue, requiring several iterations, and delaying this projects completion by almost 1 year. Initially I
had envisioned a feed auger, as this it both mechanically simple, and has been used before by similar projects, seemingly with great success. In my experience however it was
prone to jamming, something I was never able to remedy. I tried altering the pitch of the auger screw blades, the diameter, the strength of motor, but all to no avail. I eventually
gave up when the motor I had installed was stronger than the 3D-printed auger, causing it to break and release pieces of plastic into the food. This left me less than impressed,
so I decided to rethink the issue.
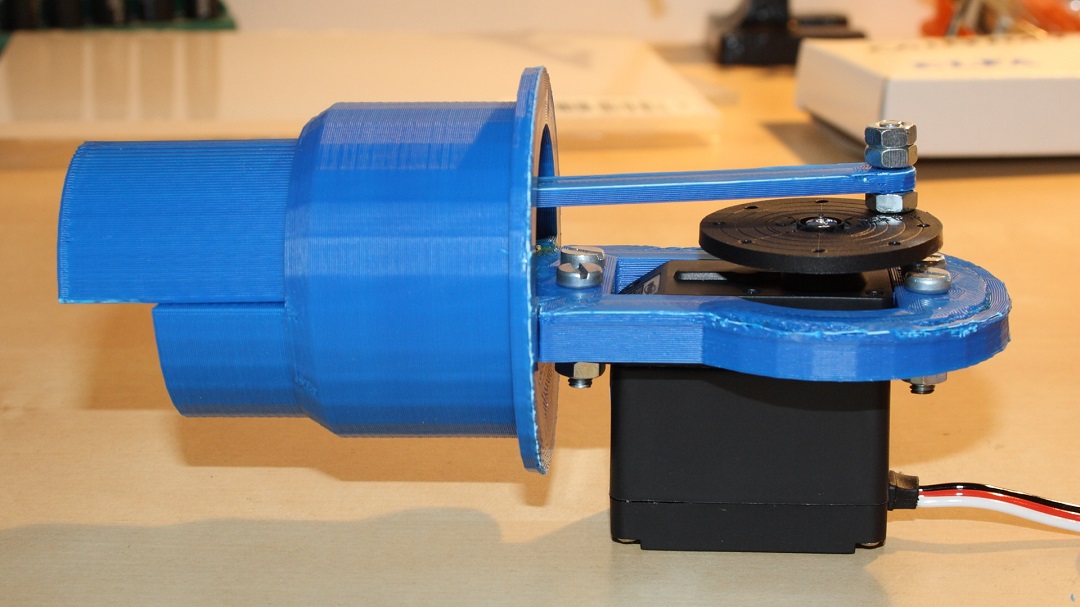
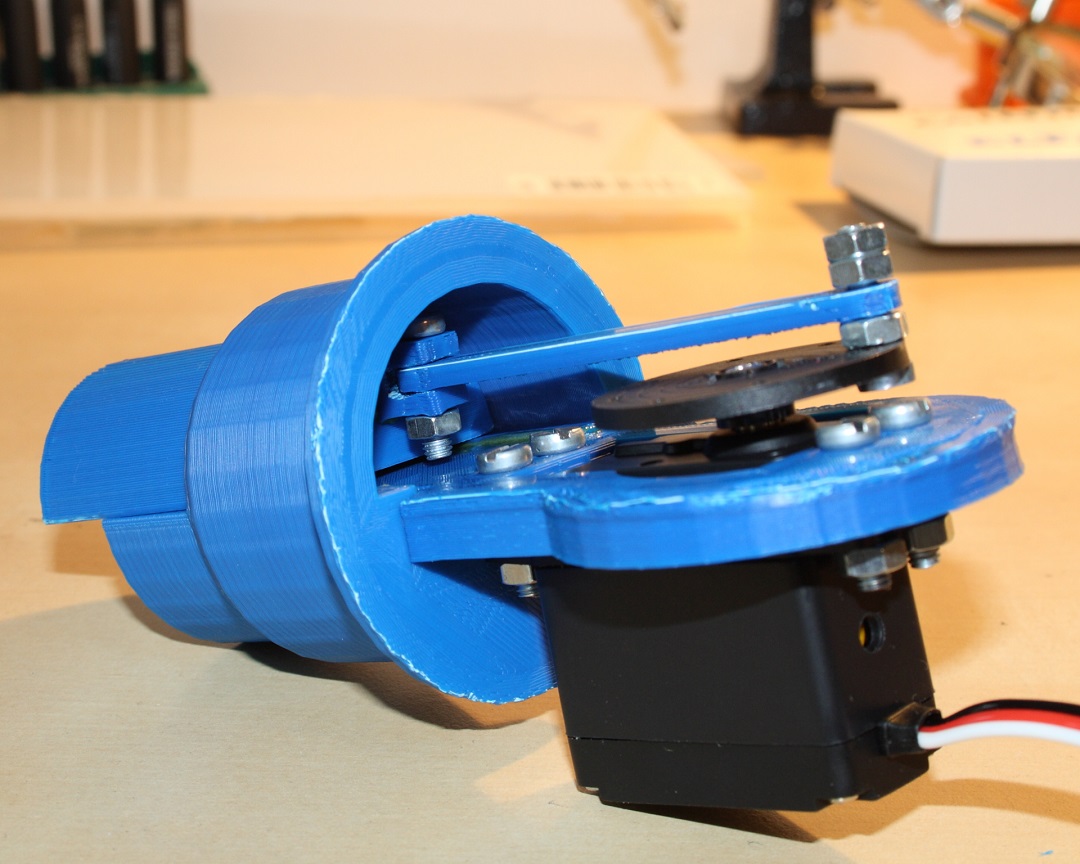
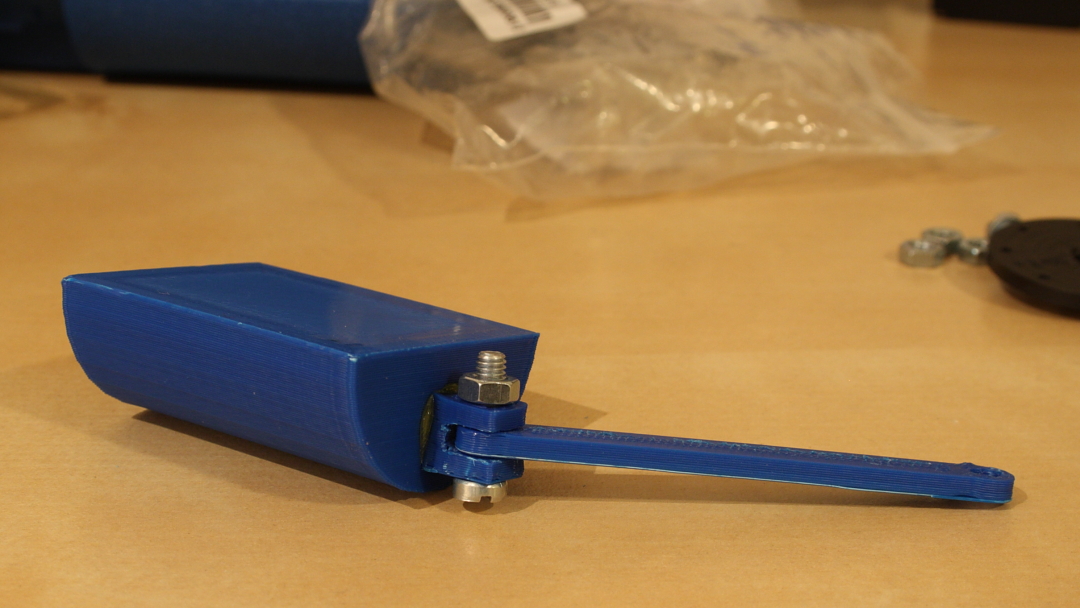
After playing with cat kibble for a while, I tried something simpler, and perhaps more intuitive. Simply shoving the food out of the pipe when required.
This required slightly more complicated machinery behind the scenes, but the sections exposed to the cat food could be simpler and more robust. All in all, the new design should in theory
be very difficult to break in a way which releases small plastic pieces into the food, and difficult to jam. Tests later confirmed this, and I'm quite happy with the results. The only
drawback over a regular auger design is an increase in moving parts, and no implicit "locking" of the food. I.e. tilting the feeder will release food as the design relies on friction between
the kibble itself to prevent all of the feed from pouring out at once. Other than the feeding mechanism, there were not many complicated parts needed. I have provided OpenSCAD files
which may or may not be easy to alter to fit different sized parts, see it on Thingiverse here. The pipe clamps were generated using this thingivser model:
Pipe clamps
To run the feeding mechanism a continuous rotation servo is used. In hindsight a geared DC motor would have worked much
better, as the piston based design has no need for motor reversal, or changes in speed. In fact, the use of a servo signal is problematic when trying to stop the motor, and the current
implementation will make a low buzzing noise when not active. Considering that the motor only runs for about 10 seconds twice a day, having it continuously idle is not favorable.
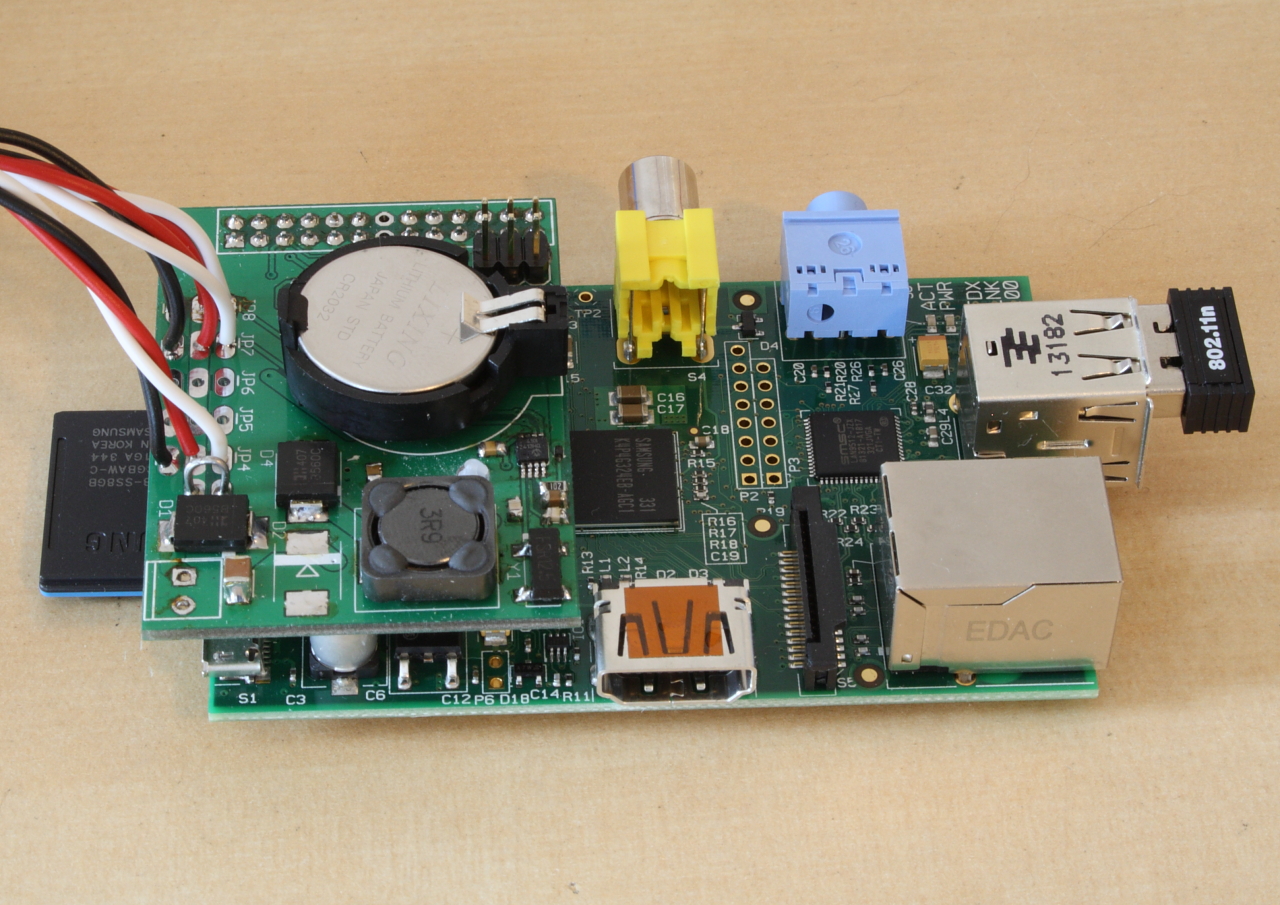
I2C Interface Board
The purpose of the I2C interface board is the following:
Provide 5V power for the Raspberry Pi
House a real time clock, so feedings can be accomplished on time even in the event of power loss and Internet loss
RTC mentioned above for also logging when power was lost/regained
Temperature sensors internal and external to the feeder, to monitor the habitat
Servo output for feeder motor control
Hopper feed level, with warning when almost empty
Power is provided by a LT3995 based buck converter, which steps voltages up to 32 volts down to 5V regulated DC. This is then used to power the interface board, and also injected directly
into the raspberry pi header to power the pi directly (thus avoiding the use of a large USB cable). Whether this still works on newer (> version 2) Raspberry Pies I am unsure. Because of
the 5V standard servo output, the ATmega controller runs at 5V also. The I2C interface of the raspberry pi, and temperature sensor both run at 3V3, so a 2N2007 based level converter is
used between them. The purpose of the ATmega is to translate 1-wire temperature sensor inputs to I2C, create servo signals controllable via I2C, and monitor the level of food in the hopper.
The specific chip used was a ATMEGA328. The internal temperature is monitored by a MCP9808 temperature sensor, which sits directly on the I2C bus. The MCP79410 serves as the real-time clock
and power up/down timer, and is also connected directly to the I2C bus. A small button cell battery is used to keep the time when not externally powered. Eagle design files and firmware can
be downloaded here.
Final Thoughts
Some general notes on what I've encountered using the feeder so far:
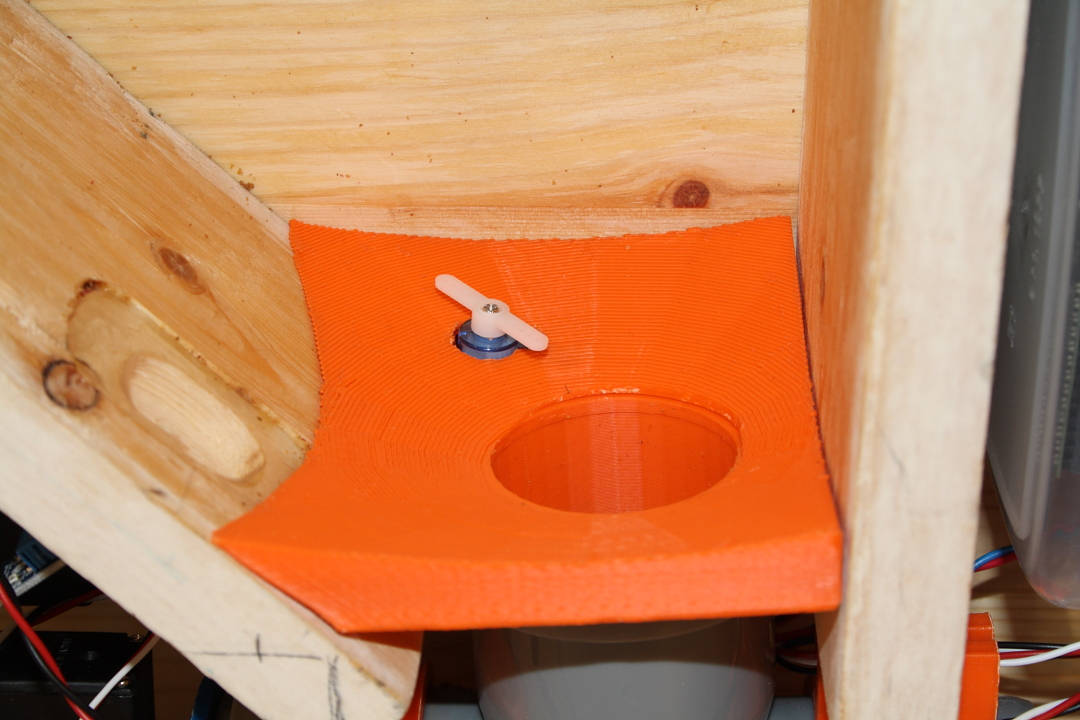
12 portions until the feeder is actually low. A special "Food dislodger" can provide another 6 feedings roughly. What the dislodger is, is a small servo arm
placed near the opening of the feeding mechanism. The arms moves back and forth whenever the feeding motor runs, which generally causes any food near the opening
to fall in rather than sit on the ledges. This entire problem could be fixed by having a sharper angle down into the feeder opening, rather than the almost flat
one I've used.
Food seems to bind onto itself easily, so feeding stops even if there is still food in the hopper. See above. Use kitten sized food if possible, and keep dry!
Check if your router has a list of reserved slots, if using DHCP. This will assign your raspberry pi the same IP address every time, making it easier to find on the
network, and also set up port forwarding rules.
Be sure to change the default password for the pi user! This device will be online and prone to hacking if discovered.
Notes for future feeder projects:
Start with the feeding section first. This is the most critical part of the feeder, and by starting on it last I created a number of problems for myself. Use a
plastic pipe or similar to hold the food so it can easily slide down without sticking, and make sure angles are steep so food can't settle on ledges. Let the food
pour out the front so cat dishes can be placed under the feeder easily.
Yes, my piston was pretty cool, but if I were to do it again I would use a sliding portion device to dish out food. The idea is to have a thick board with a hole
in the center. The hopper with food is on top, and under this board is another hole offset by some amount. In the neutral position food will fall from the hopper
and into the hole in the board, but be stopped by the bottom board. A piston can then move the middle board, so the the food contained in it is aligned with the bottom
hole, dropping the food into a dish. This would allow for food to be "locked in" when done feeding. Disadvantage is needing to monitor the position of the piston, so it
always stops in a locked position.
Recently magpies have discovered the cat feeder and seem to have taken a liking to it. Since the feeder is already vastly over-engineered, why not complicate things some more?
The cat, dog, or other pet could be given an RFID collar, which only serves food when it is in the vicinity, perhaps even with a lock when out of range. Animal RFID standards
are ISO 11784 & 11785. An alternative idea could be some form of facial recognition, but this would be difficult to make robust.
Motion captures
The motion capture function has been the most exciting feature of this project, so far it shows that neighbor cat very seldomly drop by to steal food, whereas magpies will try at every
chance they get. It's also a great way to check when the cat last ate.
Similar projects and inspiration
I'm not the first to make a fancy cat feeder, so these projects for other great ideas!
Disclaimer:
I do not take responsibility for any injury, death, hurt ego, or other
forms of personal damage which may result from recreating these
experiments. Projects are merely presented as a source of inspiration,
and should only be conducted by responsible individuals, or under the
supervision of responsible individuals. It is your own life, so proceed
at your own risk! All projects are for noncommercial use only.


 This work is licensed under a
Creative Commons Attribution-Noncommercial-Share Alike 3.0 Unported License.
This work is licensed under a
Creative Commons Attribution-Noncommercial-Share Alike 3.0 Unported License.